5 Essential Tips for Successful Furniture Rehab
Furniture rehabilitation can transform old pieces into stunning, functional items for your home. To ensure a successful project, start by assessing your furniture. Look for structural integrity and note any damages that need addressing. Take the time to clean thoroughly, as a clean canvas is essential for any refinishing work. Consider the style you are aiming for and the materials you want to use. Creating a clear plan will not only streamline the process but also help you stay focused on your design goals.
Next, prepare your workspace. Adequate lighting, protective gear, and a clutter-free environment are crucial for safety and efficiency. Gather all necessary tools and materials to avoid interruptions. When you begin the rehab process, be patient and take your time with each step—whether it’s sanding down surfaces or applying new paint or stain. Lastly, remember that personal touches can elevate your project, making it uniquely yours, so don’t hesitate to experiment with different techniques and finishes.
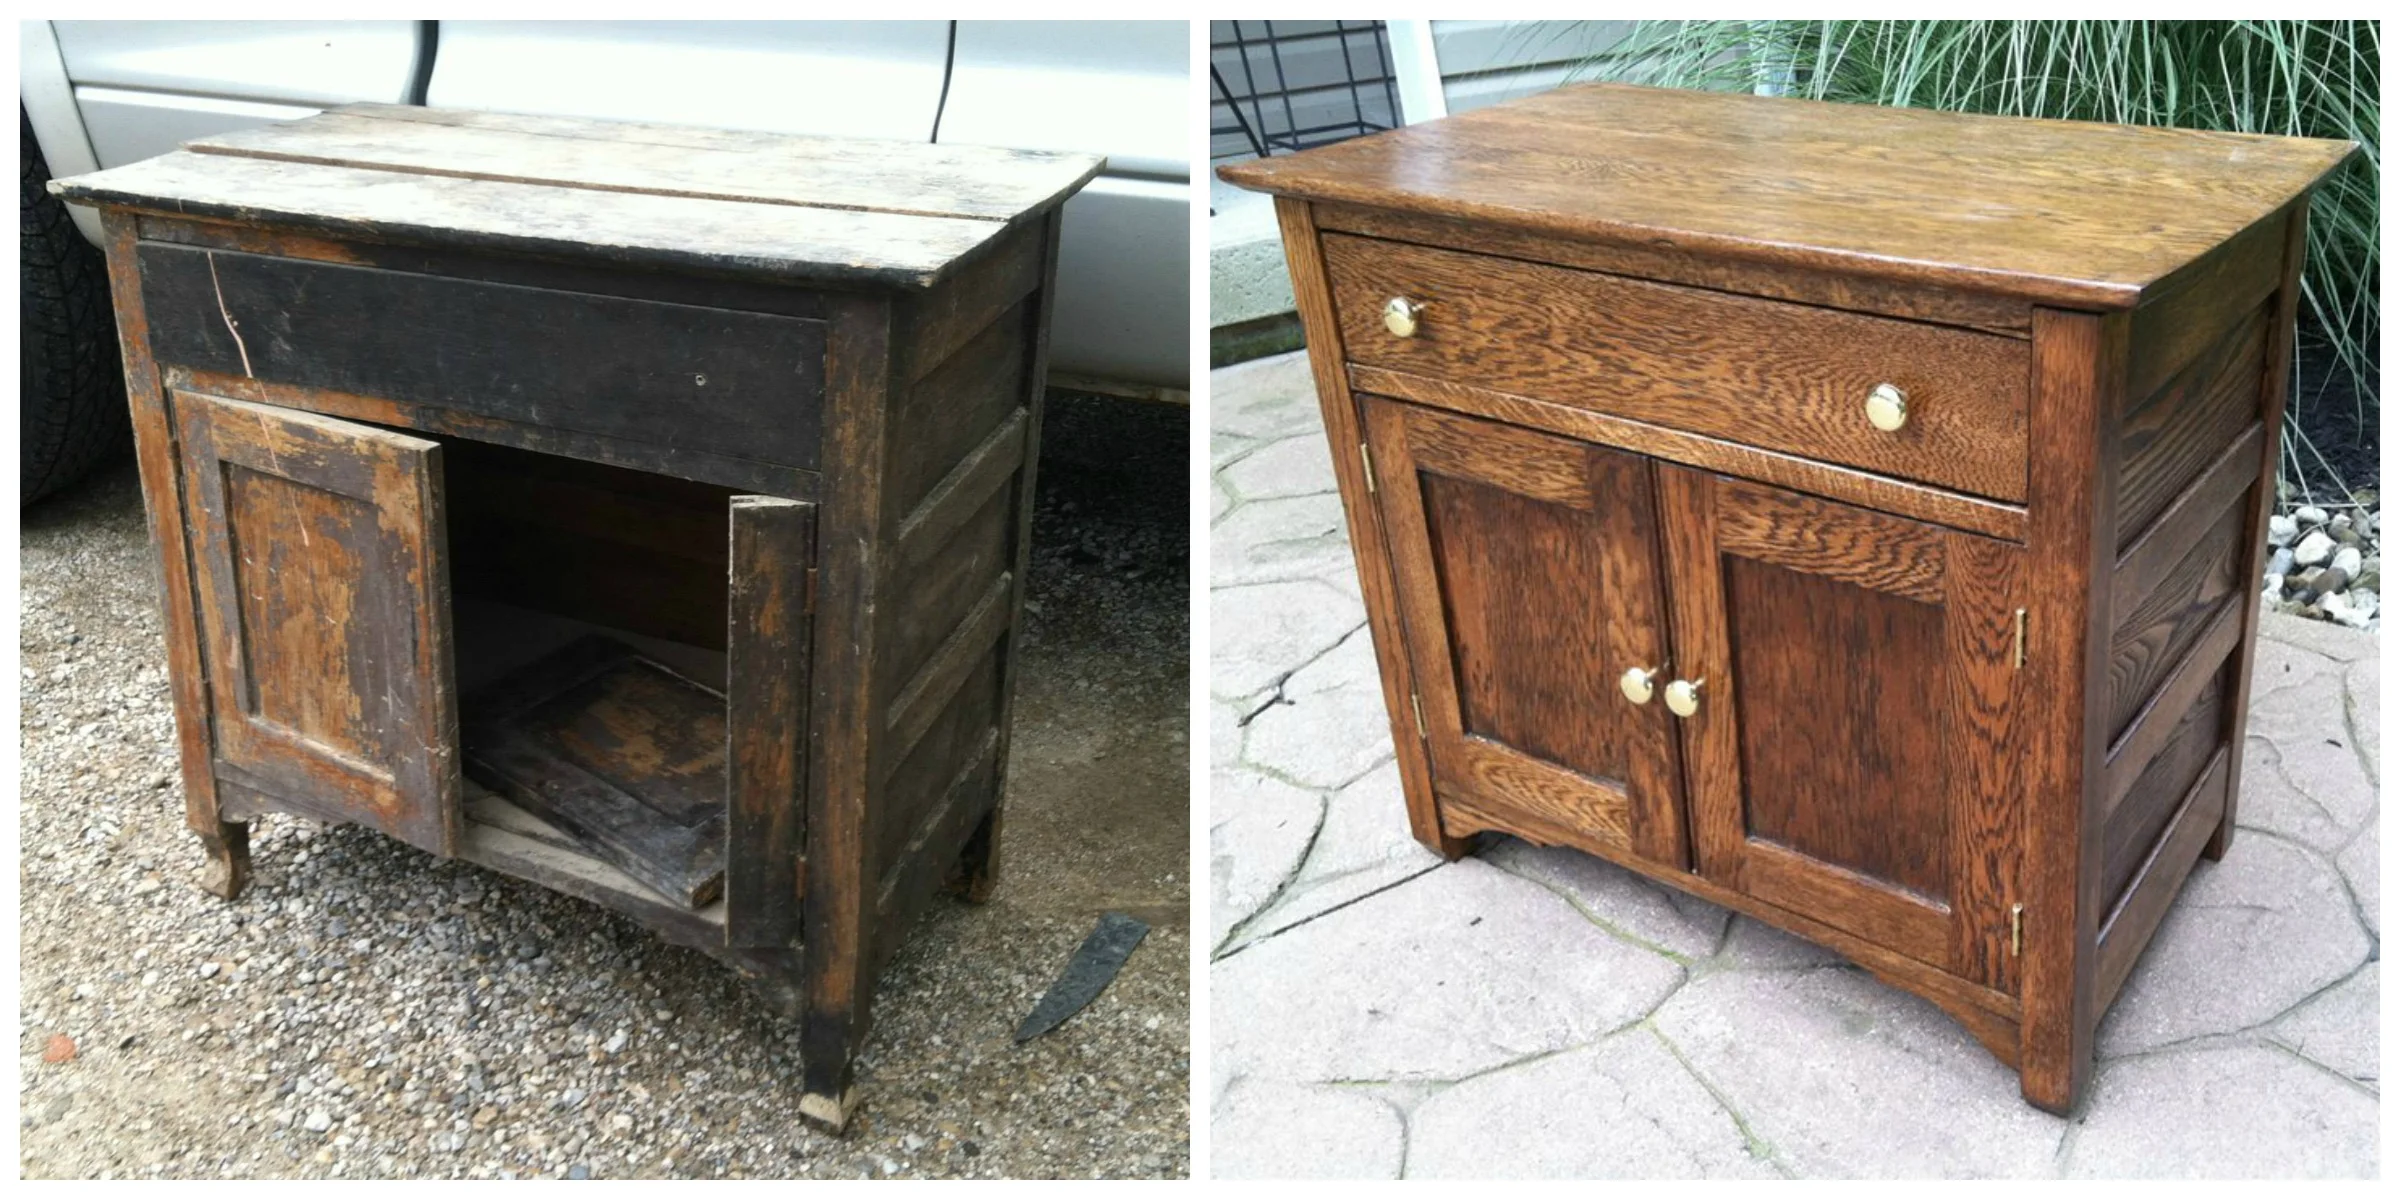
Transform Your Old Furniture: A Step-by-Step Guide
Transforming your old furniture can be an enjoyable and rewarding project that not only saves you money but also allows you to express your creativity. Start by assessing the condition of your piece: check for any structural damages, peeling paint, or worn-out upholstery. Create a plan based on the condition of the furniture and what you want the final product to look like. Gather all necessary materials, which may include sandpaper, paint or stain, brushes, and new fabric if you're reupholstering. Once you have everything ready, take a moment to visualize the changes you want to make—this will guide you through the process.
Next, follow these step-by-step guidelines to bring your vision to life:
- Preparation: Clean the furniture thoroughly and remove any hardware.
- Repair: Fix any damages with wood glue or nails where necessary.
- Sand: Sand the surface to ensure the paint or stain adheres well.
- Paint or Stain: Apply your chosen finish, allowing proper drying time between coats.
- Upholster: If reupholstering, remove old fabric and apply new fabric using a staple gun.
- Reassemble: Put any hardware back in place and your transformed furniture is ready!
Following these steps will not only enhance the aesthetic of your furniture but also prolong its lifespan.
What Materials Do You Need for DIY Furniture Restoration?
DIY furniture restoration is a rewarding endeavor, allowing you to breathe new life into old pieces while honing your crafting skills. To get started, you’ll need essential materials that ensure a successful project. Some of the primary supplies include:
- Sanding tools – both manual and electric options, such as sandpaper and a sander, to smooth surfaces.
- Paint or stain – choose your preferred finish to enhance the wood's natural beauty or add color.
- Brushes and rags – to apply paint or stain evenly and clean up excess.
- Wood glue – for repairing joints or broken furniture.
- Protective gear – gloves and masks to keep you safe from dust and fumes.
Additionally, consider other materials for DIY furniture restoration that may enhance your project. For instance, upholstery materials like fabric, foam, and batting are essential when reupholstering chairs or sofas. You might also require hardware supplies, including new screws, hinges, or pulls, to replace worn-out components. Lastly, having finishing products such as sealants or varnishes can provide your restored furniture with a final protective layer, ensuring durability and a polished look. By gathering these materials, you’re well-equipped to embark on your DIY restoration journey!